写在前面

Github Action 这个东西,是小成本和自动化持续集成的福音,如果想要小成本的使用持续集成,省去自己搭建服务器做自动构建,Git Action 就是个好东西。
没有这个的时候,你可以自己加 hook 触发,服务可以自己搭,也可以用第三方的。
Github Action 最好的优执我个人觉得是在白嫖,什么东西不要钱的都是最好的,除了玩游戏。

需求

我的需求很简单,当代码正式发版后,发布tag后,自动触发通过我的指定的Dockerfile构建镜像后,推送我们指定的 DockerHub。
Github Action 提供的操作,可以理解为你在 jenkins 的服务器上写的 Pipline 脚本,一个作用,说到这发现Github Action又把 jenkins的饭碗抢了。

使用 Github Action

照例,先告诉你怎么用,能搜到我博客的都是来解决问题的,如果还还有耐心,在解决完问题后,接着往下看。

我使用是官方推荐配置,看了一下,没有什么可以改的地方。你点开 Action 一看,它能搞的实在太多了,基本上能满足你的所有日常构建。

github-action入口

找到publish Docker Container

github-action发布docker

来看看这个文件docker-publish.yml,截图篇幅有限,直接把内容粘出来。

github-action配置docker-publish.yml

看下面这个配置

schedule: 自动调度,这个我是不需要的。
tags: 这个才是我需的正解,那么构建只构建一次,这个前提是能保证的。
env: 这项注意,这里默认的是ghcr.io,这个是 Github 提供的白嫖的Docker仓库,功能基本和DockerHub无异。这里目前项目用的还是DockerHub,这里改成DockerHub。
username: 用户名,取的环境变量,一会说在哪里配
password: 密码,取环境变量

docker-publish.yml

1
2
3
4
5
6
7
8
9
10
11
12
13
14
15
16
17
18
19
20
21
22
23
24
25
26
27
28
29
30
31
32
33
34
35
36
37
38
39
40
41
42
43
44
45
46
47
48
49
50
51
52
53
54
55
56
57
58
59
60
61
62
63
64
65
66
67
68
69
70
71
72
73
74
75
76
77
78
79
80
81
82
83
84
name: Docker

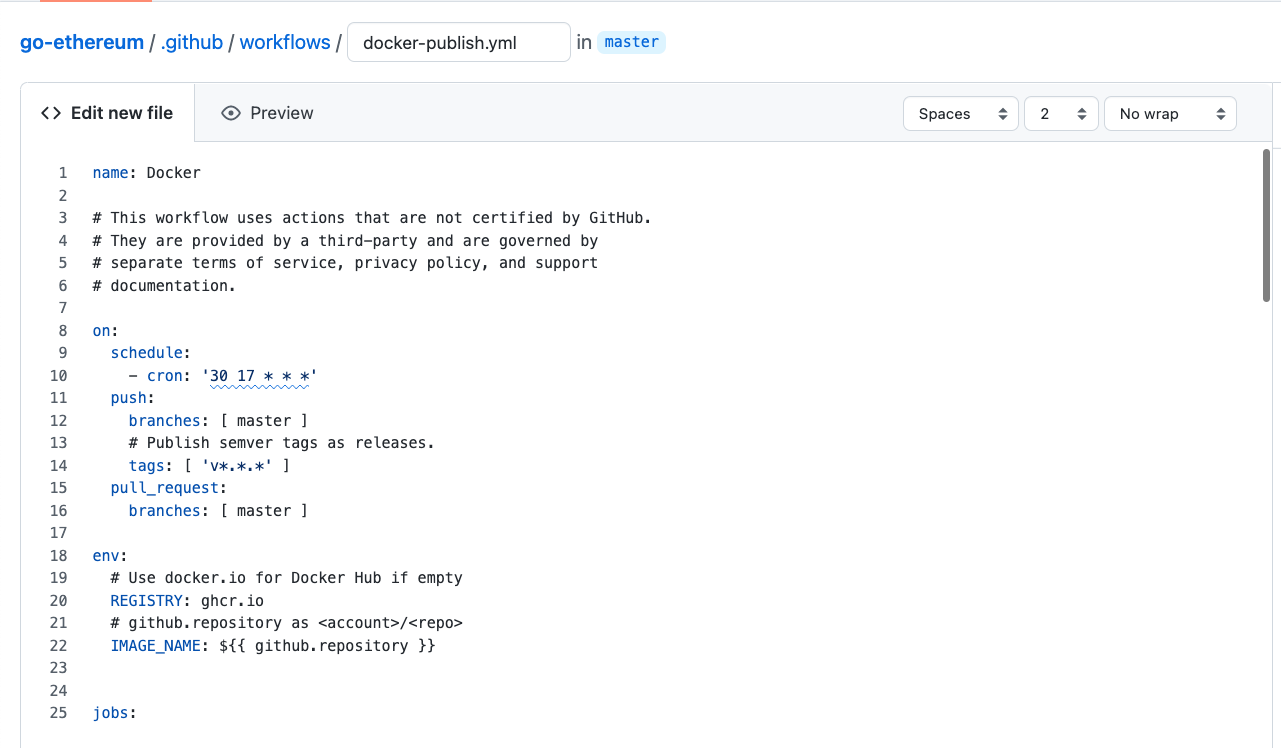
# This workflow uses actions that are not certified by GitHub.
# They are provided by a third-party and are governed by
# separate terms of service, privacy policy, and support
# documentation.
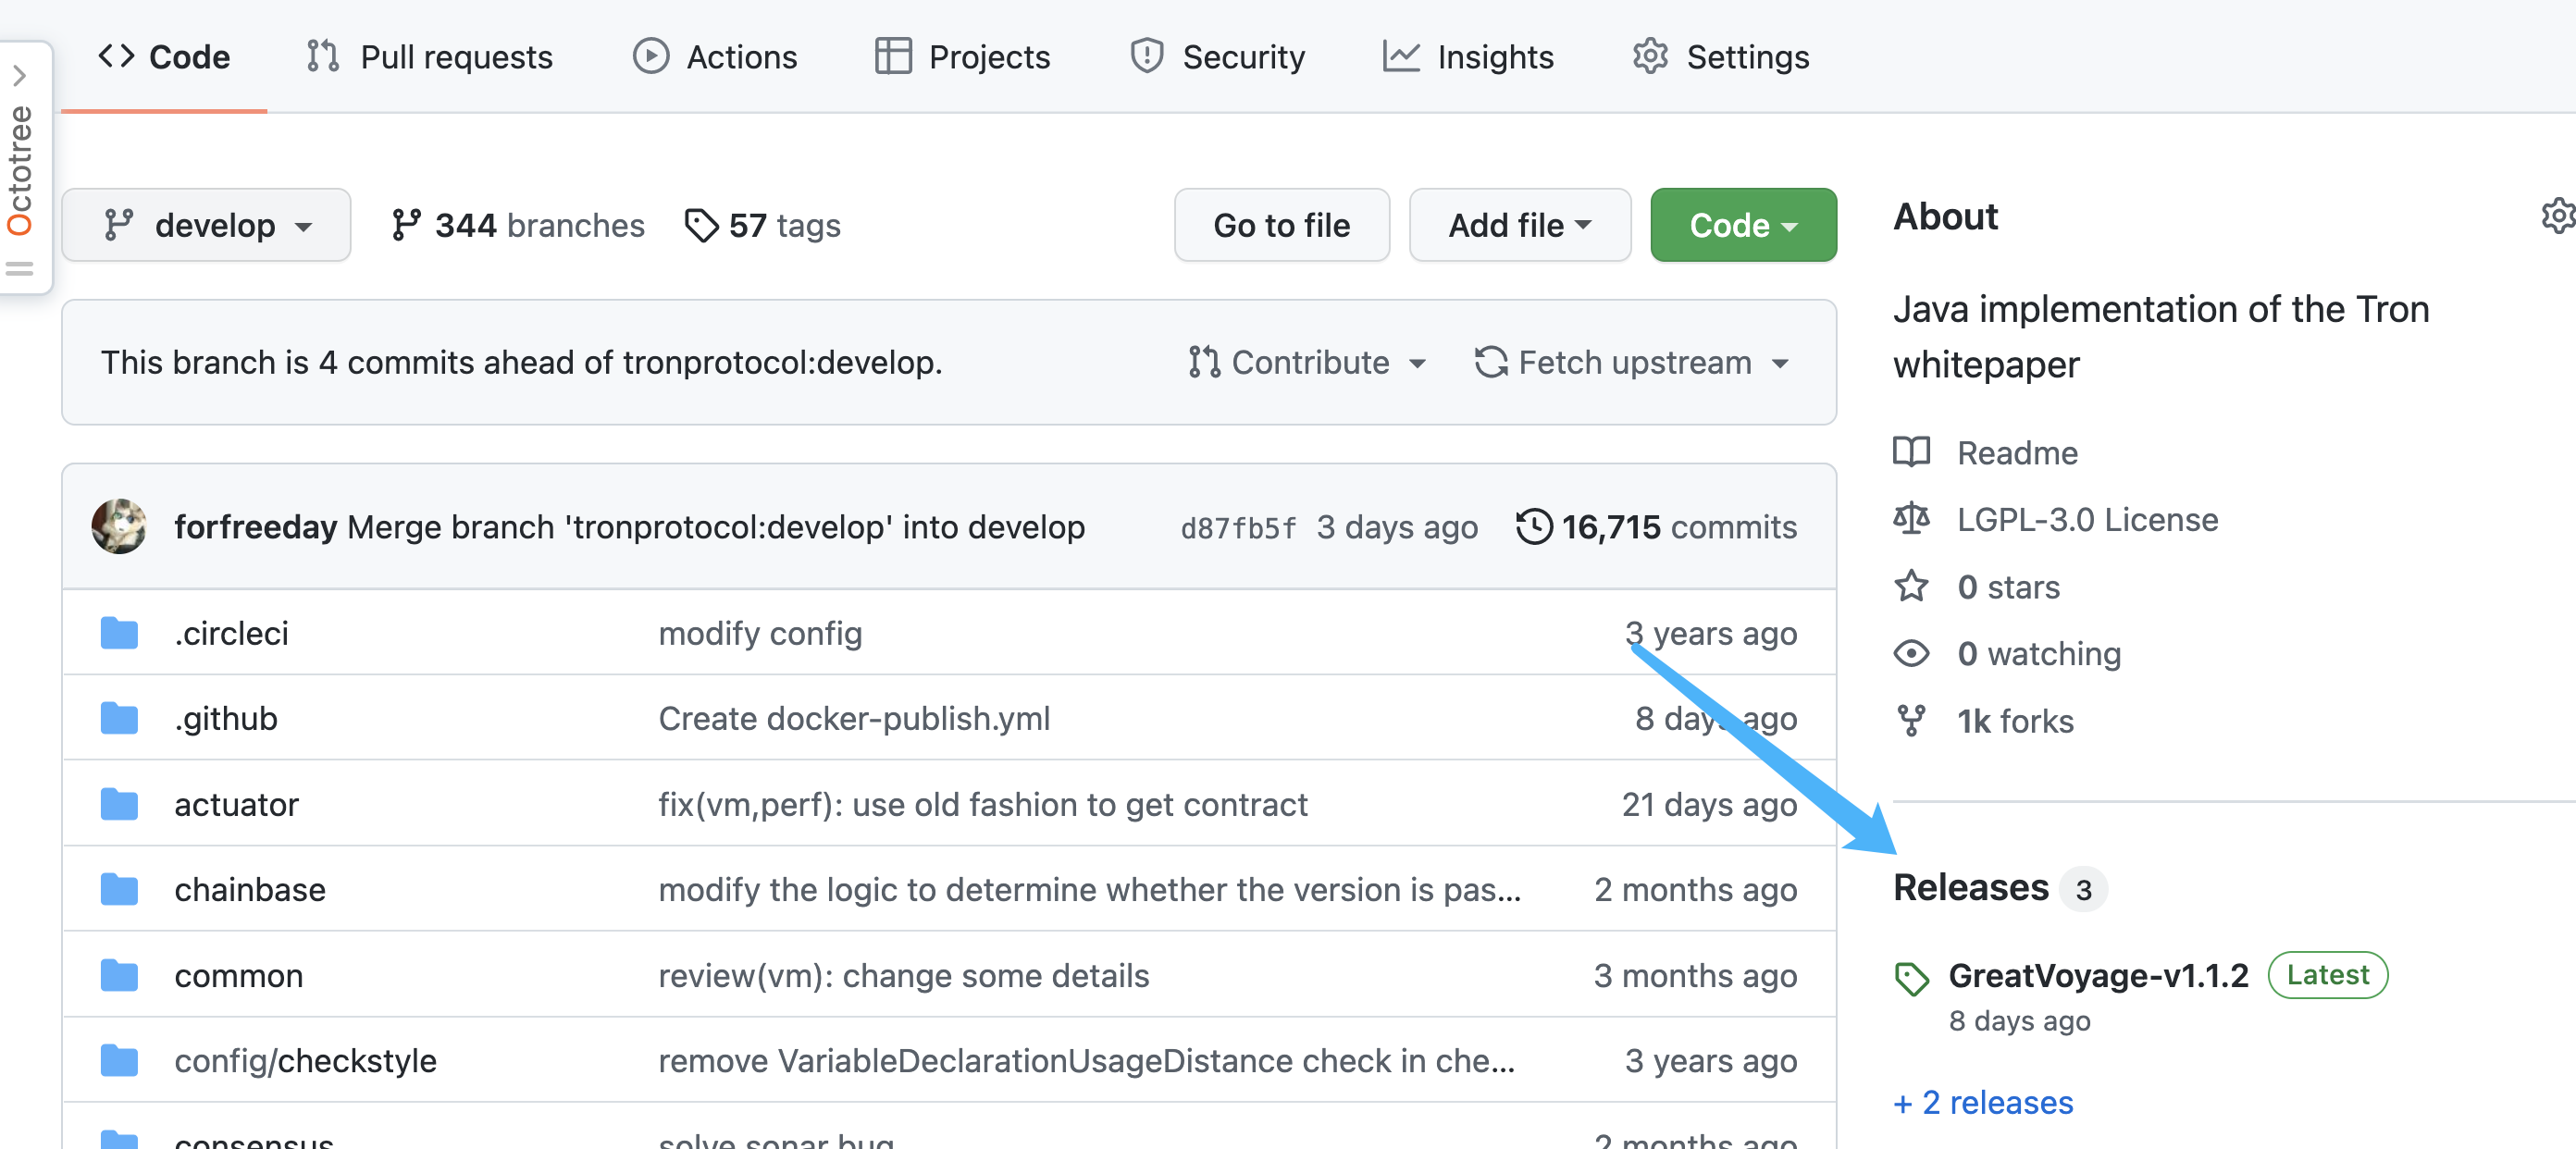
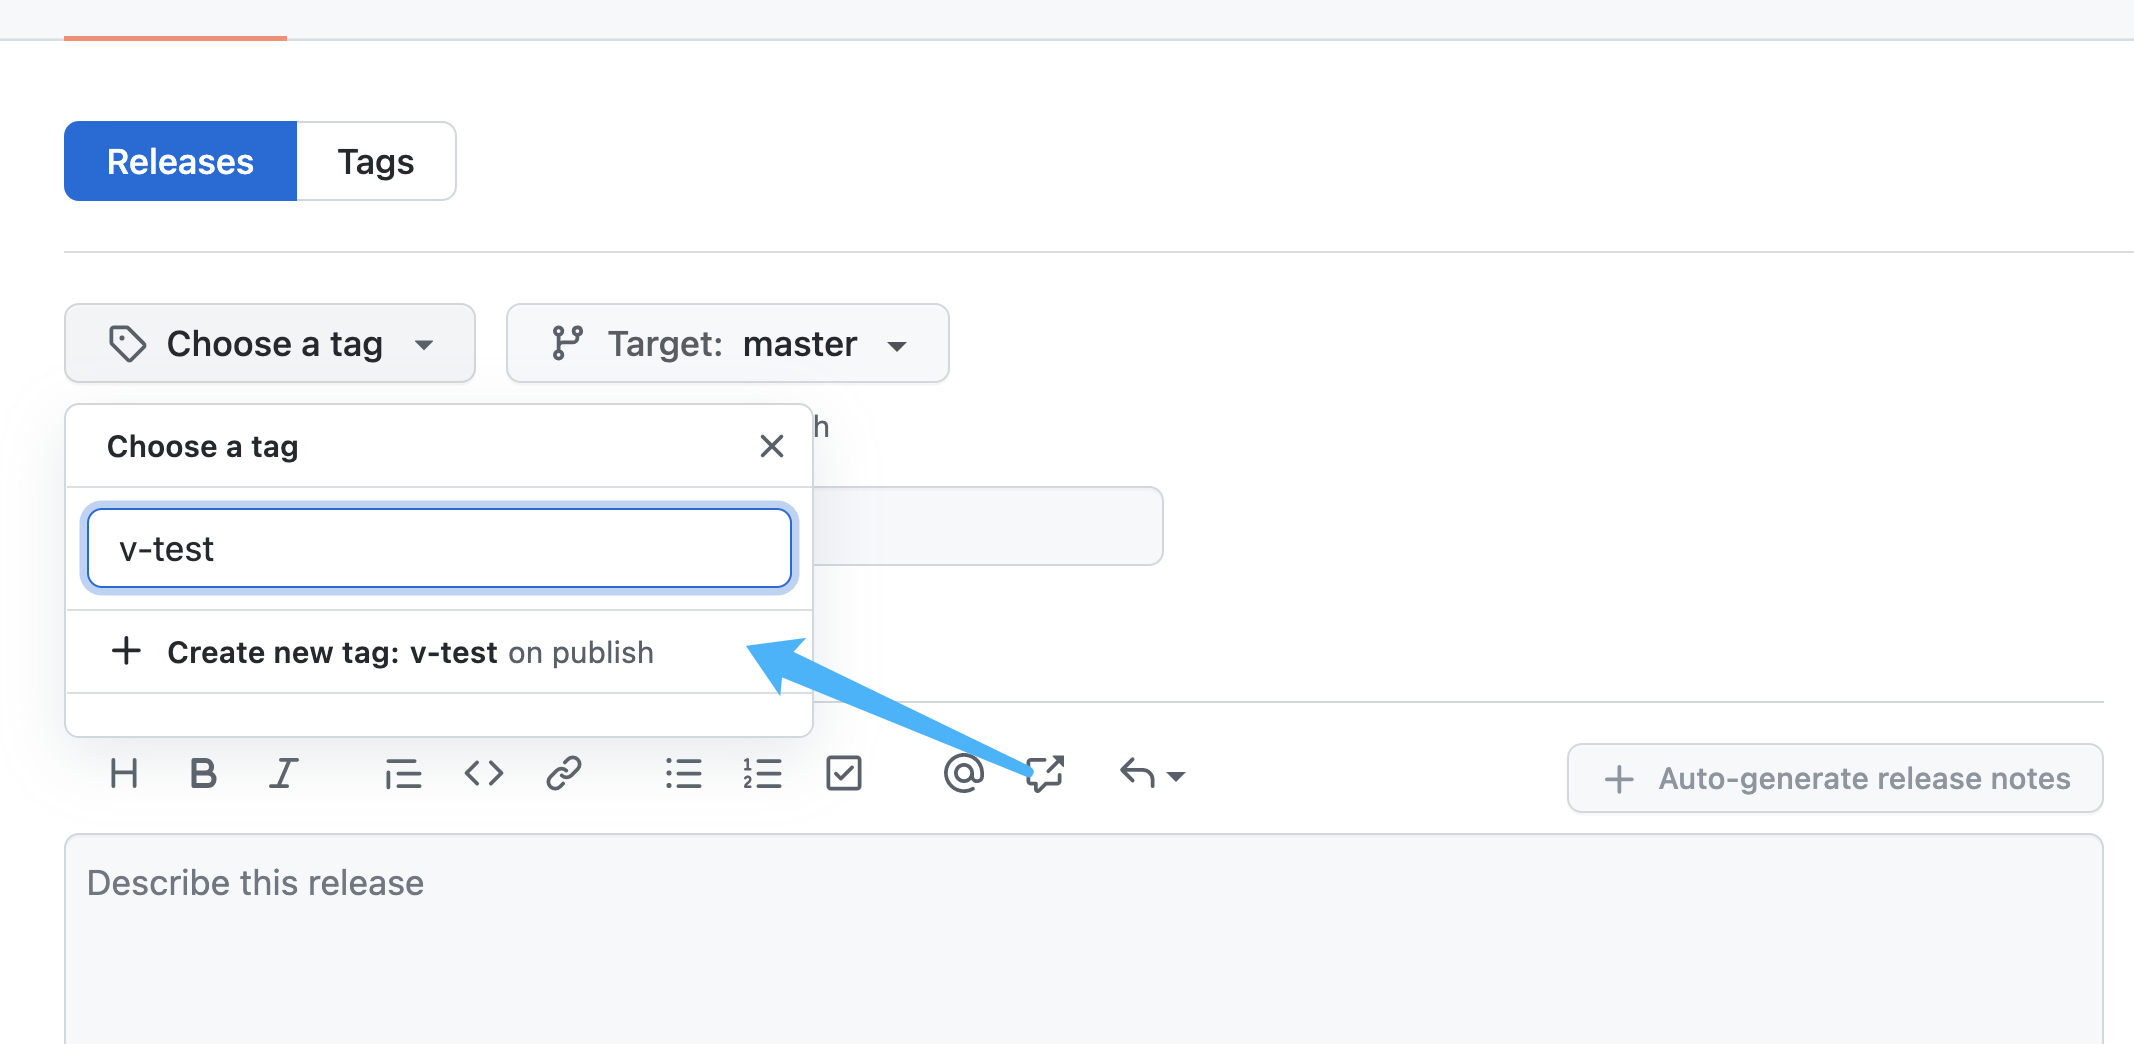
on:
push:
tags:
- "v*"

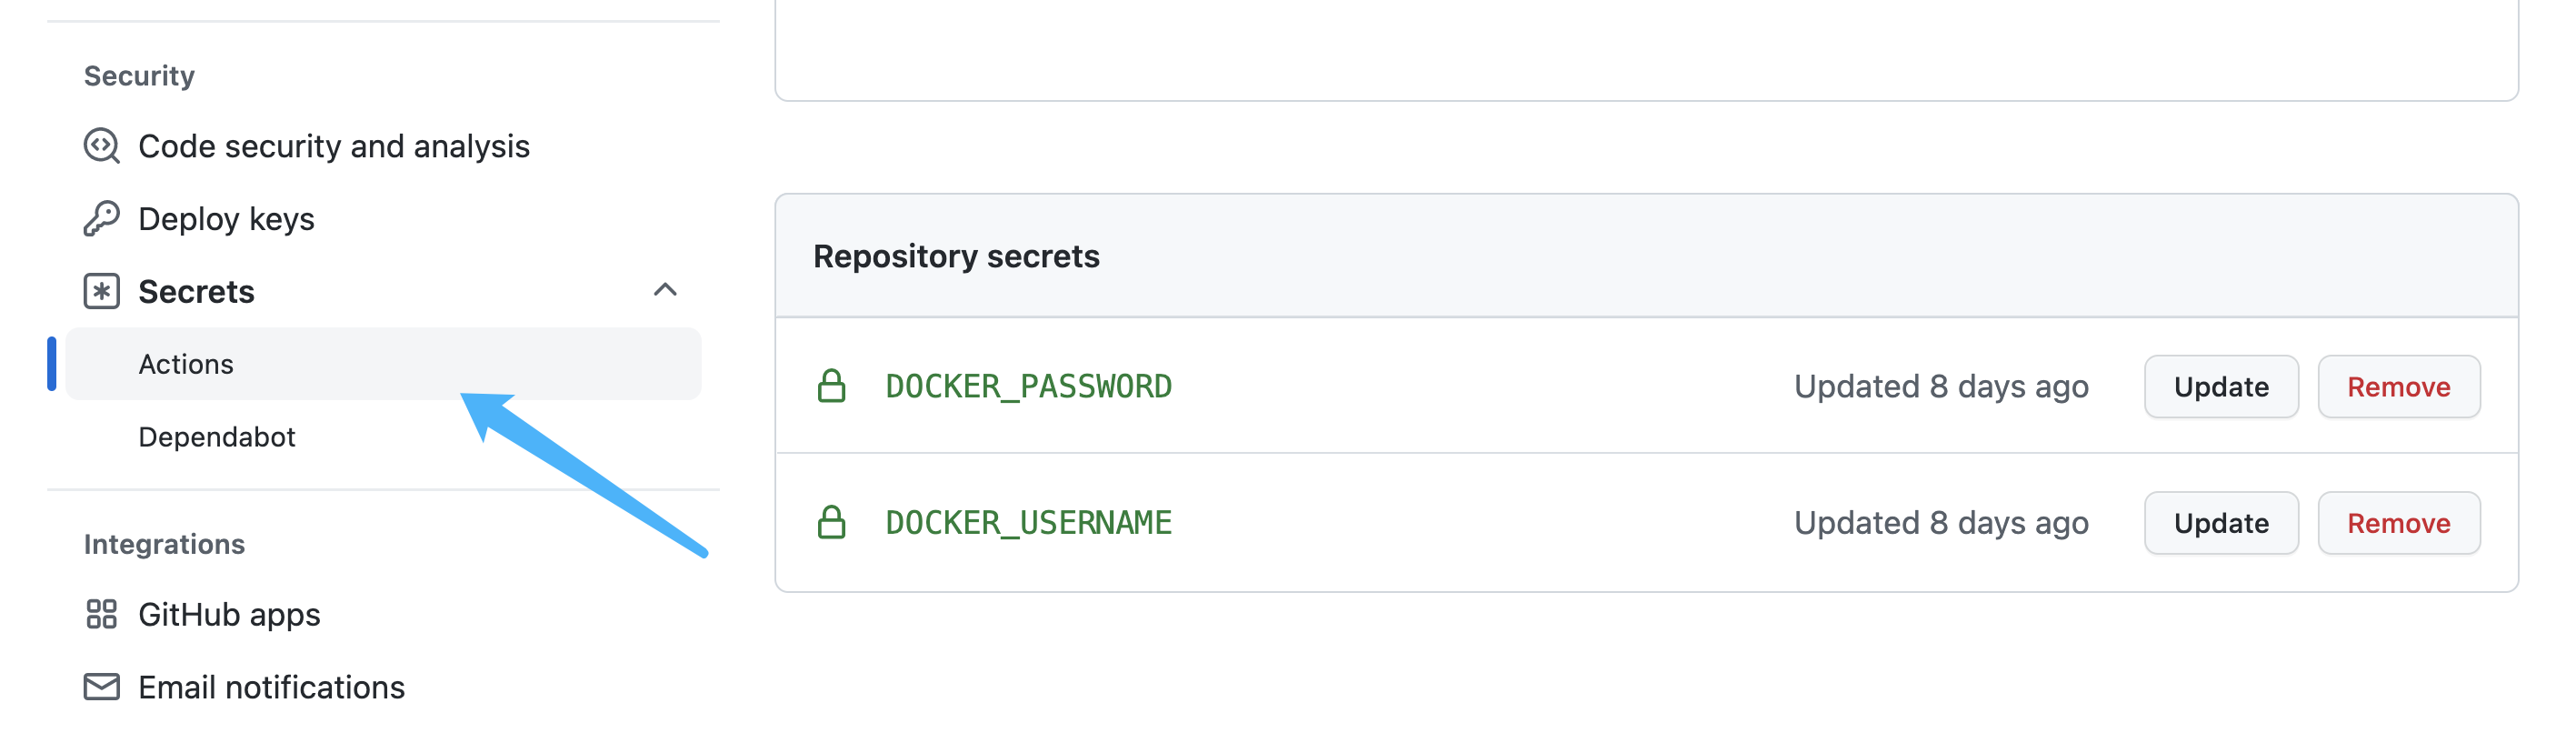
env:
# Use docker.io for Docker Hub if empty
REGISTRY: docker.io
# github.repository as <account>/<repo>
IMAGE_NAME: ${{ github.repository }}


jobs:
build:

runs-on: ubuntu-latest
permissions:
contents: read
packages: write
# This is used to complete the identity challenge
# with sigstore/fulcio when running outside of PRs.
id-token: write

steps:
- name: Checkout repository
uses: actions/checkout@v2

# Install the cosign tool except on PR
# https://github.com/sigstore/cosign-installer
- name: Install cosign
if: github.event_name != 'pull_request'
uses: sigstore/cosign-installer@1e95c1de343b5b0c23352d6417ee3e48d5bcd422
with:
cosign-release: 'v1.4.0'


# Workaround: https://github.com/docker/build-push-action/issues/461
- name: Setup Docker buildx
uses: docker/setup-buildx-action@79abd3f86f79a9d68a23c75a09a9a85889262adf

# Login against a Docker registry except on PR
# https://github.com/docker/login-action
- name: Log into registry ${{ env.REGISTRY }}
if: github.event_name != 'pull_request'
uses: docker/login-action@28218f9b04b4f3f62068d7b6ce6ca5b26e35336c
with:
registry: ${{ env.REGISTRY }}
username: ${{ secrets.DOCKER_USERNAME }}
password: ${{ secrets.DOCKER_PASSWORD }}

# Extract metadata (tags, labels) for Docker
# https://github.com/docker/metadata-action
- name: Extract Docker metadata
id: meta
uses: docker/metadata-action@98669ae865ea3cffbcbaa878cf57c20bbf1c6c38
with:
images: ${{ env.REGISTRY }}/${{ env.IMAGE_NAME }}

# Build and push Docker image with Buildx (don't push on PR)
# https://github.com/docker/build-push-action
- name: Build and push Docker image
id: build-and-push
uses: docker/build-push-action@ad44023a93711e3deb337508980b4b5e9bcdc5dc
with:
context: .
push: ${{ github.event_name != 'pull_request' }}
tags: ${{ steps.meta.outputs.tags }}
labels: ${{ steps.meta.outputs.labels }}

- name: Sign the published Docker image
if: ${{ github.event_name != 'pull_request' }}
env:
COSIGN_EXPERIMENTAL: "true"
# This step uses the identity token to provision an ephemeral certificate
# against the sigstore community Fulcio instance.
run: cosign sign ${{ env.REGISTRY }}/${{ env.IMAGE_NAME }}@${{ steps.build-and-push.outputs.digest }}

配置用户名密码

配置上面的配置当中需要用户名和密码。

github-action安全配置

github-action用户名密码

验证

上面的设定是发布tag之后自动构建,可以从 Release 中创建一个 Release、创建 Tag、发版,查看构建情况。
那我们去创建一个Tag

创建一个Release

点击创建 Draft a new release,看不见这个按钮的话,是权限问题。
创建Release

注意,Tag 名必须以v开头,因为上面脚本中我指定了以v开头,你当然可以自定义。
指定一个Tag没有就创建

查看构建情况

查看构建情况

查看完整构建步骤

查看完整构建步骤

总结

使用GitHub Action 构建相对还是比较友好的,官方文档比较清晰,再配合官方示例,基本上可以满足需求,还有完整的示例。
有个好处就是更加简化了构建的流程,相较于写Jenkins的Pipline脚本,Gihub Action 是配置化的参数,了解参数即可,没有执行脚本,这个好处坏处见仁见智。