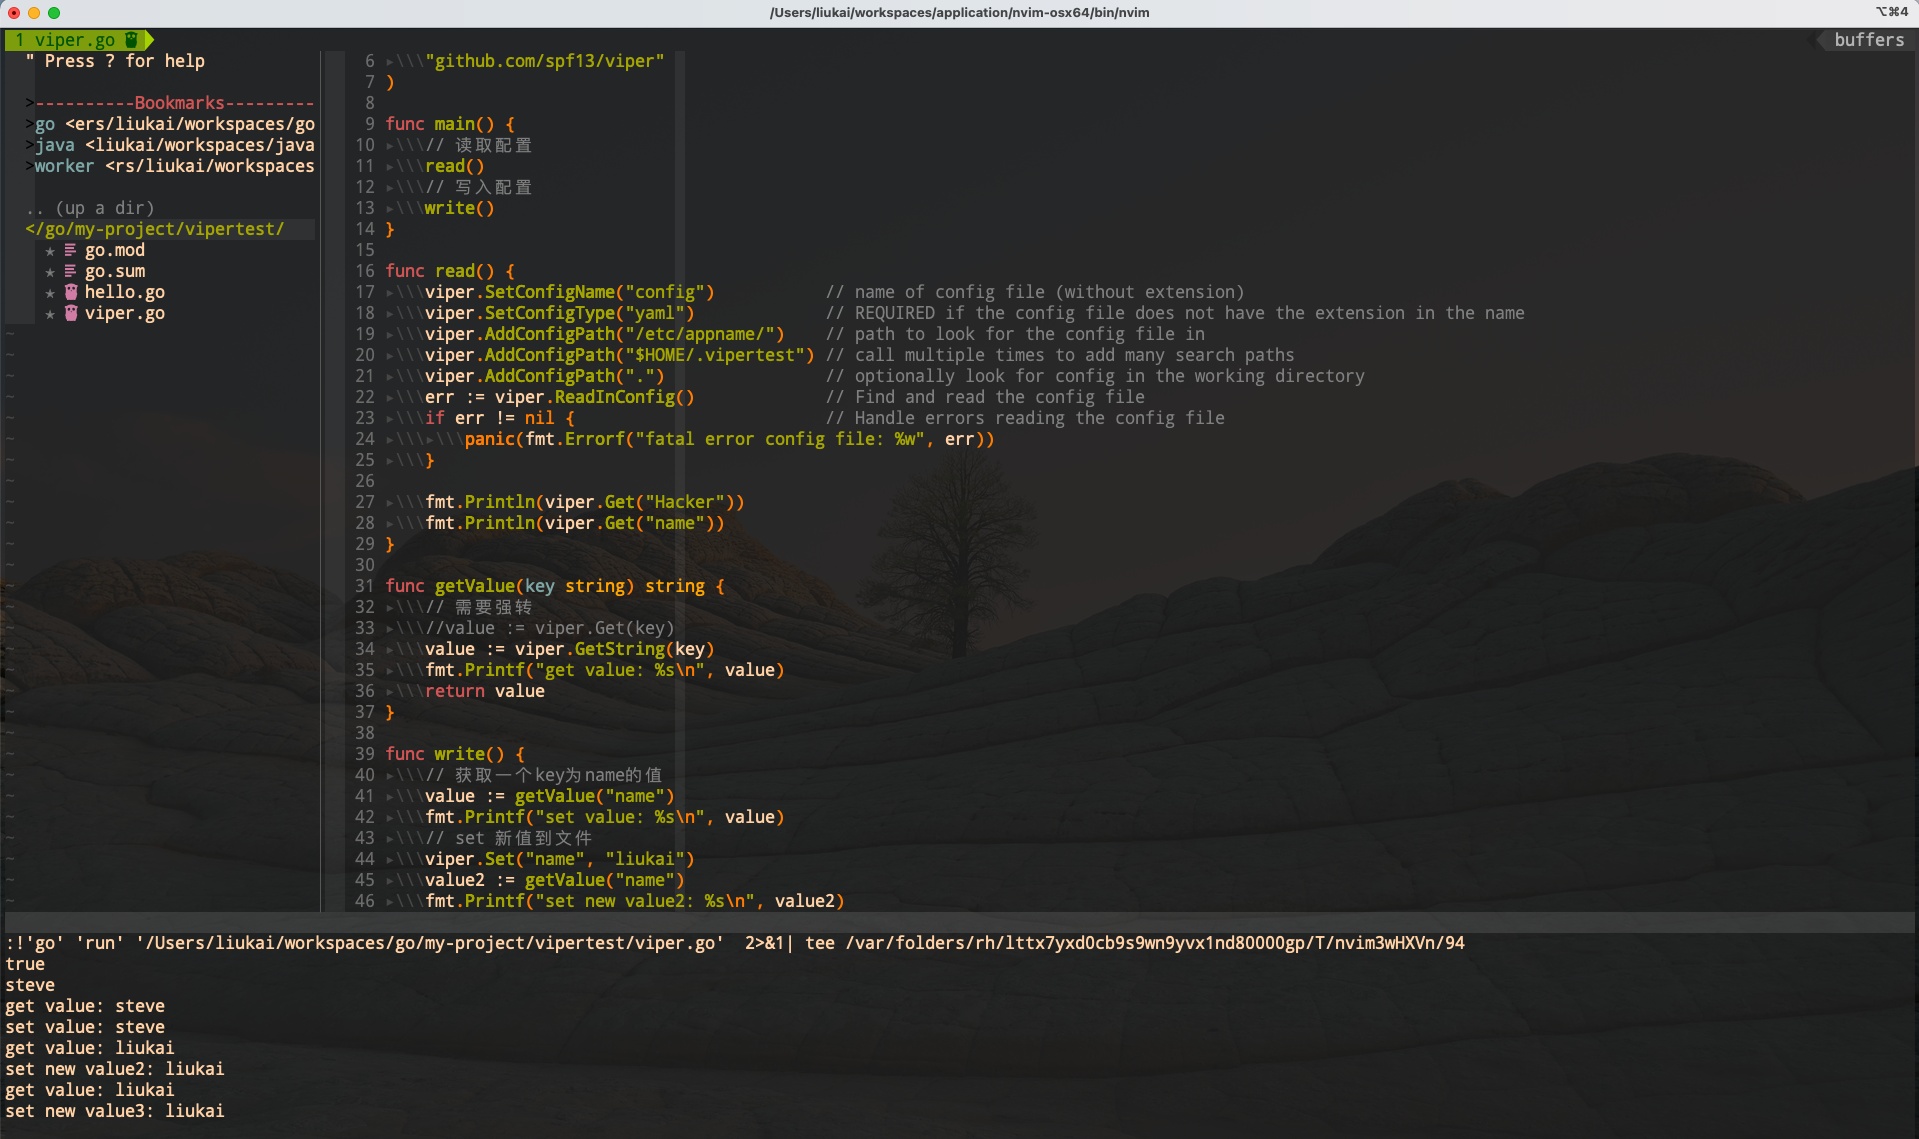
简介

看了一些开源项目,很多都会使用viper这个配置文件框架,然后了解了一番,做一下输出。
下面这些内容摘自官方github,官方的示例比较粗糙,下面稍加改动改动了一下写了几个示例。
实际这个框架写的简单好用。

viper 是一个完整的 Go应用程序的配置解决方案,它被设计为在应用程序中工作,并能处理所有类型的配置需求和格式。支持特性功能如下:

设置默认值

读取 JSON、TOML、YAML、HCL、envfile和 Java属性的配置文件
监控配置文件改动,并热加载配置文件
从环境变量中读取
从远程配置中心读取配置(etcd/consul),并监控变动
从命令行标志中读取
从缓冲区读取
支持直接设置配置项的值

viper读取配置文件的优先级顺序

viper.Set() 所设置的值
命令行 flag
环境变量
配置文件
配置中心etcd/consul
默认值

注意:viper的配置键是不区分大小写的。

创建测试项目

最简单的方式使用vscode、goland直接操作一下就完了,如果你也习惯使用vim来操作,可以直接用下面这种方式。

1
2
3
4
5
6
7
mkdir -p vipertest
cd vipertest
git init -q
git remote add origin https://github.com/forfreeday/vipertest
go mod init github.com/forfreeday/vipertest

mkdir -p $HOME/.vipertest/

添加测试数据

添加一个测试用的配置文件,这里我就创建在这个目录,仅测试用。

1
2
3
4
5
6
7
8
9
10
11
12
13
14
15
16
cat <<EOF >$HOME/.vipertest/config.yaml

Hacker: true
name: steve
hobbies:
- skateboarding
- snowboarding
- go
clothing:
jacket: leather
trousers: denim
age: 35
eyes : brown
beard: true

EOF

读配置文件

主要操作API:
指定读取的文件名: config 是指文件名

viper.SetConfigName("config")

文件后缀为: yaml

viper.SetConfigType("yaml")

文件读取路径,可以添加多个

viper.AddConfigPath("/etc/appname/")
viper.AddConfigPath("$HOME/.vipertest")
viper.AddConfigPath(".")

读取配置

写入配置

写入配置使用viper.Set()函数操作,调用这个函数只是写入到内存,还没以有直正写入到文件。
在 write 函数中,修改name的值,并添加个新的kv。

viper读写demo

最后查看一下配置,name已经被替换了,并添加了一个新的kvtestkey

配置文件

完整示例代码

1
2
3
4
5
6
7
8
9
10
11
12
13
14
15
16
17
18
19
20
21
22
23
24
25
26
27
28
29
30
31
32
33
34
35
36
37
38
39
40
41
42
43
44
45
46
47
48
49
50
51
52
53
54
55
56
57
58
59
60
61
62
63
64
65
66
67
68
69
70
71
72
73
74
75
76
77
78
79
80
81
82
83
84
package main

import (
"bytes"
"fmt"

"github.com/spf13/viper"
)

func main() {
// 读取配置
// read()
// 写入配置
// write()
// 从byte流中读取
readByIo()
}

func read() {
viper.SetConfigName("config") // name of config file (without extension)
viper.SetConfigType("yaml") // REQUIRED if the config file does not have the extension in the name
viper.AddConfigPath("/etc/appname/") // path to look for the config file in
viper.AddConfigPath("$HOME/.vipertest") // call multiple times to add many search paths
viper.AddConfigPath(".") // optionally look for config in the working directory
err := viper.ReadInConfig() // Find and read the config file
if err != nil { // Handle errors reading the config file
panic(fmt.Errorf("fatal error config file: %w", err))
}

fmt.Println(viper.Get("Hacker"))
fmt.Println(viper.Get("name"))
}

func readByIo() {
viper.SetConfigType("yaml") // or viper.SetConfigType("YAML")

// any approach to require this configuration into your program.
var yamlExample = []byte(`
Hacker: true
name: steve
hobbies:
- skateboarding
- snowboarding
- go
clothing:
jacket: leather
trousers: denim
age: 35
eyes : brown
beard: true
`)
viper.ReadConfig(bytes.NewBuffer(yamlExample))
name := viper.Get("name") // this would be "steve"
fmt.Println(name)
fmt.Printf("read by io, name: %s\n", name)
}

func getValue(key string) string {
// 需要强转
//value := viper.Get(key)
value := viper.GetString(key)
fmt.Printf("get value: %s\n", value)
return value
}

func write() {
// 获取一个key为name的值
value := getValue("name")
fmt.Printf("set value: %s\n", value)
// set 新值到文件
viper.Set("name", "liukai")
value2 := getValue("name")
fmt.Printf("set new value2: %s\n", value2)

// 设置新值
viper.Set("testkey", "liukai")
value3 := getValue("testkey")
fmt.Printf("set new value3: %s\n", value3)

// 写入到配置文件j
viper.WriteConfig()
// 安全写入
//viper.SafeWriteConfig()
}

总结

viper 即简单又强大,还可以从远程获取配置,详细直接参考官方说明。在项目中的应用感觉确实比java这种强调抽像的语言用起来更舒服一些。但是java在使用上强调编程范式,尽量遵循统一约定写起来更不容易出错,就是有些框架太过于抽象,不过习惯一下也就好了,就是阅读代码对新手不友好。